Field & Home

The short answer: Start with safety, broken pieces, duplicates, and toys with missing parts. Set a 30- to 60-minute session, sort into four labeled bins, and you can remove a dozen items without upsetting routines.
Toys to remove first
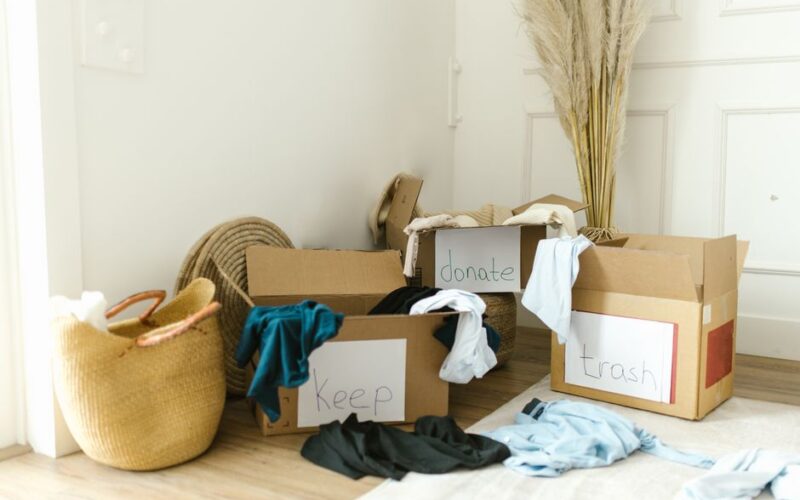
When a household is overwhelmed, focus on items that are unsafe, incomplete, or no longer engaging. Prepare a 3- or 4-bin setup before you start: Keep, Repair/Replace, Donate, Recycle/Toss. Label each bin with a 3 x 5 inch card and use a kitchen timer set for 20 minutes for the initial quick pass.
1) Broken toys with small loose parts: Remove anything with sharp edges, exposed screws, or small detached pieces that present choking hazards. Inspect each item for loose fasteners; if a repair needs a special tool or part that will take more than 2 weeks to source, recycle the piece. For soft toys with tears, set aside a repair pile and sew or glue within 7 days if you plan to keep them.
2) Games missing pieces: Board games with 10% to 30% of pieces missing lose play value and teaching function. Open the box and count missing pieces; search for replacements for up to 7 days. If replacements are unavailable, keep intact components like boards or cards and recycle the rest so the box does not take storage space indefinitely.
3) Single-purpose toys outgrown fast: Items that need adult setup for each use often sit unused. If a toy has not been used in 90 days, place it in Donate so someone else can get weekly use. Consider photographing and noting the toy size (for example: 12 x 8 x 6 inches) before donating.
4) Duplicate toys: Children rarely need three identical stuffed animals or five identical truck sets. Keep 1 to 2 favorites and remove extras; aim to reduce duplicates by about 50%, which typically frees roughly 1 cubic foot of shelf space per family member.
5) Noisy electronic toys: Toys that emit constant sound or light are often short-lived favorites. Limit keepers to one multi-function device per child and move extras to the Repair or Donate bin within 30 days, removing batteries first and disposing of them at a household battery drop-off.
6) Toys with expired batteries or nonstandard power needs: If a toy requires rare batteries you don’t keep, move it to Repair/Replace. Replaceable battery checks should be completed within 14 days or else donate the item; for rechargeable toys, make a note of charger type and store chargers together in a labeled bag.
7) Art supplies that are dried out: Toss markers and paints that no longer work and keep a fresh kit limited to 10 commonly used items per craft box. Store fresh supplies in a 12 x 8 x 6 inch container and date the container so you refresh supplies every 6 months.
8) Freebies and promotional toys: Small giveaway toys add clutter quickly and often lack durability. Keep 2 to 3 small items for travel and recycle or donate the rest; a single 30-minute session can clear 20 to 40 of these pieces from drawers and backpacks.
9) Costumes that no longer fit: Keep one size up and one size down for dress-up rotation; pass along others. Store retained costumes in a clear bin roughly 15 x 12 x 8 inches so you can see contents and rotate pieces every 8 weeks to keep them appealing.
10) Broken ride-ons and large plastic toys: Large broken items take up disproportionate space. If a replacement part costs more than 30% of a new unit, recycle the broken piece and plan for a single replacement only if the toy gets weekly use. Measure the footprint before buying a replacement: aim for units that fit within a 36 x 24 inch storage zone.
11) Puzzles worn beyond repair: Bent pieces and missing corners reduce usability. Keep puzzles that have at least 80% of pieces intact; limit stored puzzles to 6 per child and rotate the set every 2 to 3 months to maintain engagement.
12) Toys that encourage unsafe imitation: Items that mimic sharp tools or contain small detachable parts should be removed immediately if they present risk. Keep age-appropriate replicas only and follow manufacturer age recommendations, removing any item rated 2 or more years below your child’s age.
After you remove the first round of items, take 10 minutes to bag donations, photograph anything you plan to sell or list online, and place recycling items in the right curbside or municipal bin. Label donation bags with date and destination to track pickup or drop-off within 14 days.
Donation and recycling
Timers, percentages, and windows that clear toy sprawl.
Source parts 7 days max
Hunt replacements 7 days, sew repairs inside 7, batteries decided inside 14.
Halve the duplicates
Keep 1 to 2 favorites and cut duplicates 50 percent for a cubic foot back per person.
“Parents report less resistance when they offer a treasure box of 3 small new items in exchange for 10 old ones, a ratio that helps children understand loss and gain in concrete terms.”
—
How to declutter them
Start with a reconnaissance sweep: set a 20-minute timer and walk through play areas collecting all toys that meet your removal criteria. Work quickly on the first pass to avoid arguments; place items directly into labeled bins and sort later in a calm workspace such as a kitchen table.
Use a clear workspace and keep cleaning supplies handy: a mesh laundry bag for soft toys, mild detergent, a soft brush, and a 1:10 bleach solution or EPA-approved disinfectant for plastic toys. Wash plush toys in a mesh bag on warm and air-dry for 24 hours; wipe rigid plastic toys, rinse, and allow parts to dry fully before packing to prevent mold.
Create simple decision rules to reduce fatigue: a 2-week test for maybe items, a 50% cap for duplicates, and a 3-item limit for freebies. If a child argues to keep something, offer a 24-hour cool-down by placing the contested item in a sealed ‘maybe’ box labeled with the date; if untouched after 14 days, move it to Donate.
Organize storage with clear stackable bins sized 12 x 15 x 10 inches for small toys and 24 x 16 x 12 inches for larger items so contents are visible. Label bins by play type—blocks, vehicles, dolls, art supplies—and use a rotation schedule to swap two bins monthly, keeping about 25 to 50 percent of toys in storage at any time.
Schedule maintenance: short 15 to 30 minute check-ins monthly and a deeper 60-minute purge each season. Put the next session on the calendar immediately after you finish and set a recurring reminder so maintenance becomes routine rather than a one-off chore.
When preparing donations, bundle small parts in clear sandwich bags and attach them to the game box with a staple or tape. For online sale or swap, take 3 to 5 clear photos, note dimensions (length x width x height), and list condition and any missing parts in the description to speed the sale and avoid returns.
If you need to involve kids, turn sorting into a brief game: a 10-minute tidy race with a small reward if bins are correctly filled, or ask children to choose 1 item to keep for every 3 they release. Maintain firmness on safety-related removals but offer control on sentimental choices to reduce pushback.

Frequently Asked Questions
Further reading: How to Declutter a Junk Drawer in Twenty Minutes Flat · How to Sort and Dispose of Unknown Household Items
Sources: EPA Safer Choice