Field & Home

The short answer: Let go with structure: use time limits, measurement-based keepsake rules, and a 4-box system to preserve memories while freeing space.
Plan Your Emotional Sorting
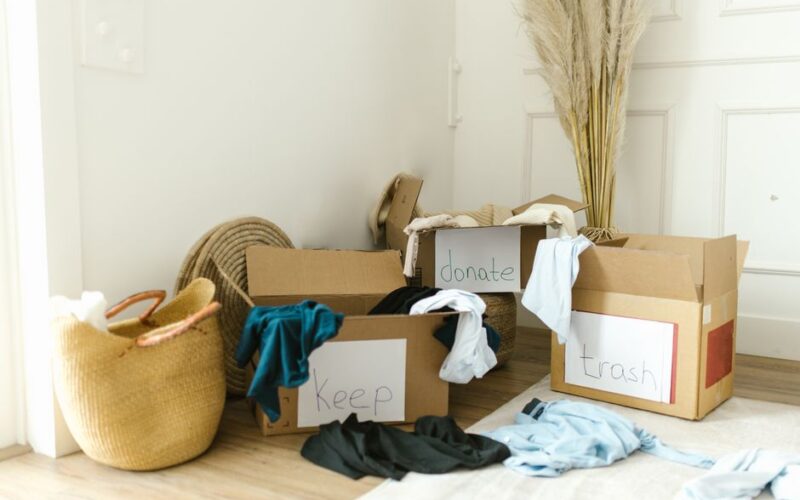
Start with a short, scheduled session so emotions do not overwhelm decision making. Block two 45-minute sessions per category for the first pass, and a 90-minute review session for keepsakes you are unsure about. Set a timer and have four labeled containers ready: Keep, Photograph, Donate, Recycle. Use one 12x8x6 inch archival box per person for long-term keepsakes; sizing containers in inches helps you limit volume and make objective choices.
Gather simple supplies before you begin: three clear quart-size bags for temporary sorting, one 12x8x6 inch box for final keepsakes, sticky labels and a black marker, a smartphone for photos, and a small notebook to record provenance for special items. Label containers with dates and brief notes. If an item requires archival care, note that on the label with a recommended action, for example wrap textile items in acid-free tissue within 24 hours to prevent stains.
Use the 4-box method as a concrete rule: Keep only what fits the archival box and matches at least two criteria on your list, Photograph anything you love but cannot or will not keep, Donate items in usable condition within 30 days, and Recycle or responsibly discard damaged items immediately. For photos, limit saved prints to a single 6×8 photo album per year or digitize and retain up to 200 images per major life event to keep volumes manageable.
Why this method works
Sessions, boxes, and photo caps that beat guilt.
Least sentimental first
Drawers before letters builds momentum; 24-month use plus hobby plus box-fit decides each piece.
Shoot three views
Overall, detail, and scale on neutral light; donate usable inside 30 days.
Keep boxed
- Fits the one archival box plus two rules
- Best for: true heirlooms with notes
- Tissue-wrap textiles in 24 hours
Photograph and release
- Three views keep the memory alive
- Best for: loved but unkeepable bulk
- Donate or recycle the originals

Practical Release Strategies
Work in small, high-value zones so you make progress you can feel. Start with the least sentimental area to build momentum, such as desk drawers or hobby supplies, then move to boxes of old papers and finally to the most sentimental items like letters and childhood toys. For each item, use quick prompts: When was the last time you used this in the past 24 months, does it represent an ongoing hobby, and does it fit within your one-box limit? If it fails two of three prompts, move it to Photograph or Donate.
Photographing items can be fast and meaningful when done with intent. Use a clean neutral surface and natural light, and capture three views: overall, detail, and a scale reference such as a coin or ruler. Store photos in dated folders on your device and back them up to two locations, for example an external drive and a cloud folder, within 7 days. Add a one-sentence note for each image including a date or short story to preserve context; 10 to 20 words is enough.
Set a 90-day grace period for uncertain keepsakes. Place items in a sealed box labeled with the date and a review date exactly 90 days later. If you have not opened the box or felt its absence in daily life by that date, let the item go. For inherited items you intend to keep for sentimental reasons, limit to one item per family member per decade and record why you kept it in the notebook so future generations will understand the choice.
When donating, choose organizations that accept specific categories and have pickup windows within 14 days so items do not bounce back. For fragile or valuable items consider selling at a consignment shop within 60 days, with proceeds split or used to fund a keepsake preservation project. For paper ephemera that you do not keep, scan at 300 dpi and shred or recycle the originals within 14 days to prevent future regret while preserving the information.
Small rituals make release feel respectful. Before letting an item go, say a short phrase of gratitude and take one photograph. If you are disposing of a bulky item, allow yourself 5 minutes to write a memory about it, then put that note in the photograph folder. Concrete steps like a 5-minute ritual and a dated photo help convert guilt into closure.
Packing and labeling the archival box: place flat paper and photos on the bottom, then smaller three-dimensional items on top so you never exceed the 12x8x6 inch limit. Wrap textiles in acid-free tissue and do not fold heavy objects more than once to avoid creases; use two sheets of tissue per textile and store boxes off the floor. For long-term storage aim for a climate-controlled location near 60 to 70 degrees Fahrenheit and relative humidity around 45 to 55 percent, and check boxes every 12 months for pests or moisture.
Quick decision checklist for sessions: limit each item to 60 seconds of evaluation, answer the three prompts, and commit to a box. If an item sparks a major story that would take more than 5 minutes to record, photograph it and make a 3- to 4-sentence entry in your notebook instead of keeping extra volume.
“The key is replacing forever with a measured timeframe; concrete limits free you to keep what matters without being overwhelmed by what does not.”
—
Two 45-minute passes plus a 90-minute keepsake review keep emotions from flooding.
One 12 by 8 by 6 inch box per person caps volume with objective edges.
A single 6 by 8 album yearly or 200 digital frames per event holds the story.

Frequently Asked Questions
Further reading: Where Does Paper Clutter Come From? Digitizing Piles for Good · How to Sort and Dispose of Unknown Household Items
Sources: EPA Safer Choice