Field & Home

The short answer: Start with one measurable swap per meal and expect 8–12 exposures before a new food becomes familiar.
Start with Small Changes
When adjusting meal plans for picky eaters, the most reliable tactic is incremental change. Pick exactly one element to alter at a time—portion, texture, or seasoning—and keep everything else constant so the child recognizes the meal. For example, if a child refuses broccoli, keep the same main and starch but offer 1 tablespoon of finely chopped broccoli mixed into a familiar sauce; increase to 2 tablespoons after 3 successful meals.
Use a concrete 7-step exposure routine: 1) present a tiny portion (see sizes below), 2) allow touching but not pressure, 3) offer a neutral carrier (bread, rice, or sauce), 4) model eating the item yourself at the table, 5) praise any attempt, 6) record the outcome, and 7) repeat on the next scheduled exposure. Repeat 3 times per week to hit 9 exposures in 3 weeks.
Portion guidance reduces waste and resistance: toddlers start with 1 tablespoon per year of age (so a 3-year-old gets 3 tablespoons), preschoolers 2–4 tablespoons, and older children an introductory 1/4 cup (60 ml). For adults trying a new food, offer a 1/3-cup (80 ml) taster portion. Use measuring spoons or a 1/4-cup scoop while training to keep servings consistent across meals.
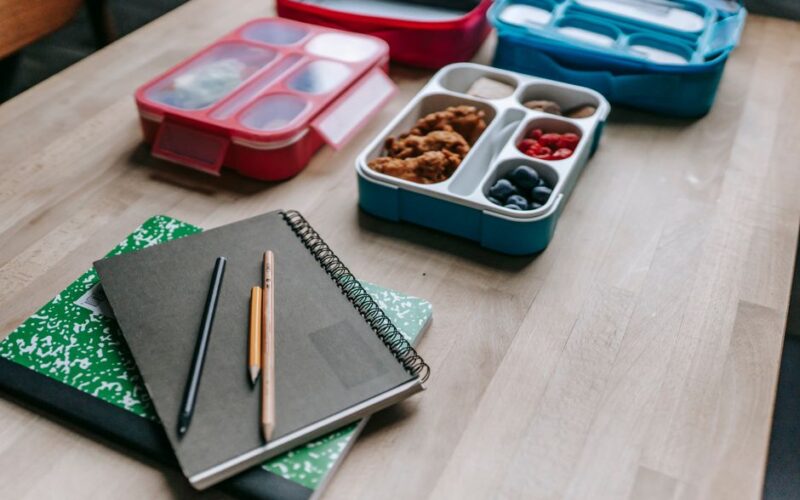
Materials that speed success: a set of 1-cup and 2-cup airtight containers for batch components, 1-cup and 1/4-cup scoops, and a simple acceptance chart on paper or a phone note with columns for date, food, portion size, and result (0/1/2). Keep a pencil at the table and record within 12 hours of the meal so you preserve accurate patterns.
For texture changes, try three progressive steps: step A finely chop or puree, step B lightly steam until tender, step C offer the intact version. Allow 3 exposures at each texture step before progressing. If no progress after 12 total exposures, pivot: change the carrier (try cheese or tomato sauce), the cooking method, or reduce the portion to half the previous size before retrying.
Timing tip
Three exposures per texture step.
Template the week
Anchor each day with a favorite protein plus two familiar sides, then rotate only 1 or 2 experimental items.
Progress textures slowly
Move from finely chopped to steamed to intact, allowing 3 calm exposures at each step before judging.
“Small portions, familiar carriers, and routine exposure beat drastic menu overhauls.”
—

Build a Flexible Weekly Plan
Create a template week that keeps favorites predictable while rotating one or two experimental items. A reliable sample: Monday favorite protein + two familiar sides; Tuesday mix-in night (add 1–2 new bites); Wednesday repurpose leftovers into a wrap or casserole; Thursday themed dinner with a single small swap; Friday family-choice comfort meal. This predictable rhythm reduces anxiety and makes planning repeatable.
Batch-cook core components on a single day to reduce evening friction. Roast a 3–4 pound chicken (roast 20 minutes per pound at 425°F, then rest 10 minutes) and portion it into 4–6 meals; cook 3 cups (uncooked measure) of rice to yield about 6 cups cooked and store in two 2-cup containers; boil 12 ounces of pasta for the week, drain, toss with a teaspoon of oil and cool in a shallow pan before refrigerating. Label containers with the prep date and use within 3–4 days for cooked chicken and rice, and 3 days for pasta to keep texture acceptable.
Organize a 60–90 minute prep session split into stations: station A roast proteins (30–45 minutes active), station B cook grains (20–30 minutes), station C chop and blanch vegetables (15–20 minutes active), station D cool and portion (10–15 minutes). Use two 1-gallon zip-top bags or airtight tubs for each vegetable type, and write the date on each container with a permanent marker to ensure rotation.
Introduce new flavors using familiar carriers in measurable ratios: start with 1 part new ingredient to 3 parts familiar (1:3), move to 1:1 by the fifth exposure if tolerated. Example mix: stir 1 tablespoon pureed roasted carrot into 3 tablespoons of tomato sauce for pasta; next time use 2 tablespoons carrot to 2 tablespoons sauce. For spiced introductions, begin with 1/8 teaspoon of a mild spice per cup of sauce and increase gradually to 1/4 teaspoon over 3 exposures if accepted.
Offer controlled choices to give picky eaters agency: present two acceptable sides boxed as “side A” or “side B” rather than open options. For example, ask “Would you like carrot sticks (2 sticks, 2 cm each) or cucumber slices (5 slices) with dinner?” This keeps decisions limited and quick while preserving child autonomy.
Keep a short fallback list of 10–20 minute dinners with exact timings so stress nights are solvable: scrambled eggs with toast (10 minutes: 3 eggs scrambled, 2 slices toast), quesadillas using 1 cup shredded chicken and 1/2 cup cheese (15 minutes), baked sweet potato (bake at 400°F for 45–50 minutes or microwave 8–10 minutes depending on size) topped with 1/4 cup cottage cheese. These options maintain nutrition and reduce pressure to accept new items every night.
When writing grocery lists, group items by cooking method to streamline the prep day: roast-friendly vegetables (carrots, sweet potato, onions) together, grill-ready proteins together, and quick-saute vegetables (zucchini, bell pepper) together. This lets you prepare 2–3 component batches in one 60–90 minute session and swap them into the weekly plan as needed without extra trips to the store.
Use simple reheating rules: reheat leftovers to an internal temperature of 165°F when possible, or steam until hot for 2–3 minutes on medium heat. For safety and best texture, consume refrigerated cooked meals within 3–4 days, and freeze portions intended for longer storage in 1-cup servings for up to 3 months.

Frequently Asked Questions
Further reading: Why Do Meal Plans Fall Apart by Wednesday? · Two-Week Rotating Meal Calendar Explained
Sources: FoodSafety.gov