Field & Home

The short answer: Trail blazes and cairns are simple signals: learn their colors, shapes, spacing and context, use three quick checks (direction, distance, and terrain), and carry a baseline compass and map to resolve ambiguity.
Reading Blazes and Cairns
Trail blazes are painted or nailed markers on trees, posts, or rocks that indicate the intended path. Typical blaze colors are white for primary routes, blue for side trails, and yellow or red for connectors; local systems vary, so always check the trailhead sign or park brochure before you start. A standard painted blaze is a rectangle about 5 by 10 centimeters (2 by 4 inches); double blazes, offset vertically by about 3 to 5 cm, usually indicate a turn or junction.
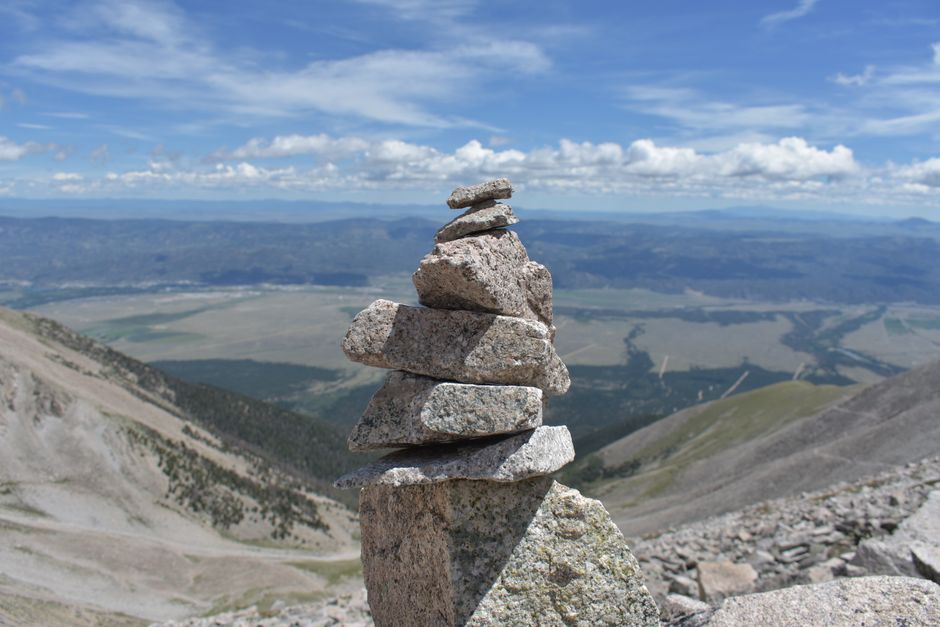
Cairns are human-built rock piles used where vegetation or rock makes painted blazes impractical. A functional cairn is stable and deliberate: a base rock roughly 15–30 cm (6–12 in) wide, stacked to about 30–120 cm (1–4 ft) high depending on visibility needs. Small, loose stacks are often accidental and should not be followed. When you see a cairn, note the alignment of its flat faces: the axis of the stacked stones commonly points along the intended route.
Spacing is a key clue. On well-marked routes, blazes appear every 50–300 meters (roughly every 160–1,000 feet) depending on terrain visibility. In dense forest expect closer intervals; on open ridges, markers may be spaced farther apart. If you go more than two typical marker intervals without seeing another blaze or cairn, stop and retrace to the last confirmed marker rather than guessing a line forward.
Read blazes in sequence: a single rectangular blaze usually means ‘stay straight’; a double blaze with the upper mark offset indicates the direction of the turn — the offset side shows the turning direction. If blazes change color at a junction, follow the color assigned to your route on the trail map. When a blaze is accompanied by directional arrows or mileage plates, use the numeric signposts to confirm expected distances; for example, a 1 km sign at a junction means the next major waypoint should be about 1,000 meters along that route.
Quick identifiers
Sizes, spacing, and checks that keep you on route.
Run three checks in 60 seconds
Confirm bearing, next waypoint inside 50 to 300 meters, and terrain match before committing past any junction.
Stop after two misses
Two marker intervals with nothing seen means retrace to the last confirmed blaze or cairn, never guess forward.
Single blaze
- One rectangle means stay straight
- Best for: confirming the line every 50 to 300 m
- Keep walking, watch the next interval
Double blaze
- Offset upper mark shows the turn side
- Best for: junctions and direction changes
- Stop, read offset, then commit
Navigation Techniques and Safety
When a marker is ambiguous, use a three-check routine: 1) Direction check: confirm the marker aligns with your bearing from the map or compass; 2) Distance check: estimate if the next waypoint should appear within the expected 50–300 meter window; 3) Terrain check: ensure the visible route matches the mapped feature — ridgelines, stream crossings, or switchbacks. Run each check in 20–60 seconds so you can decide without losing pace.
Carry and know how to use a baseplate compass and a paper map; battery-powered devices can fail. Take a compass bearing from a known marker to your next junction: for example, if the map calls for a bearing of 075 degrees and the visible trail leads at 120 degrees, stop and reassess. Practice taking and following a bearing up to 2 km in non-technical terrain until you can align map, compass, and physical features in under 5 minutes.
When following cairns on open rock or talus, watch for false cairns made by hikers trying to ‘improve’ the trail. Legitimate cairns are usually well-built and repeatable; if you encounter multiple small, haphazard piles within a 20-meter span, they are likely knocked-over markers and not trustworthy. If the cairn axis and worn footpath disagree, trust the worn path if it shows recent, consistent footprints, but revert to map and compass if footprints look older than a single day of use.
At junctions, pause and compare at least two indicators before committing: map position relative to contour lines, blaze color or pattern, and any mileage plates. If you are in a group assign one person as navigator for each 10–20 minutes of travel to keep marker observation consistent. In low-visibility conditions like fog or heavy snow, shorten your marker interval expectation to 10–50 meters and consider marking your own temporary indicators with biodegradable tape that you remove on return.
Practice low-impact etiquette: do not build new cairns except where necessary to prevent harm, and never dismantle a legitimate cairn. On mixed-use trails, preserve signage and report missing or vandalized blazes to the managing agency; many parks post a maintenance schedule indicating repaint cycles, often every 1–3 years depending on traffic and weather.
“Treat markers as navigation aids, not directions: always confirm with map and compass when in doubt.”
—
Frequently Asked Questions
Further reading: Blackberry Foraging: Responsible Summer Picking Guide · Calm Lake Kayaking: A First-Timer Safety Guide
Sources: National Park Service