 Field & Home

The short answer: Plan layers so you can add or remove one piece in 30 seconds: start with a breathable base, carry a 150–300 g midlayer, and a 40–80 g compressible insulating shell plus a waterproof shell for wind and rain.
Essential Layering Principles
Mountain weather changes fast because elevation, exposure and wind combine to alter temperature and moisture in minutes. Think of layering as a modular system: a moisture-managing base against skin, an insulating midlayer to trap warm air, and an outer shell to block wind and precipitation. Each component should be chosen for a function and a range: base for wicking and quick dry, midlayer for 150–300 grams of insulation equivalent for day hikes, and shell rated to shed at least 5,000 mm hydrostatic in sustained rain. Keep layers light and compressible so adjustments take fewer than 60 seconds.
Start with the base layer: merino or synthetic fabrics that pull sweat away and dry in under 60 minutes when air-dried. For cool mornings, pick a midweight base (150–200 g merino or 140–180 g synthetic). On hot days, a lightweight base (120–150 g) reduces overheating. Fit matters: a slightly snug base layer maximizes moisture transfer, while loose bases trap cold air. Avoid cotton; it holds 250–500% more water by weight than synthetics and increases chill risk during wind or when temperatures drop 10–15°F.
Quick materials list
Weights and times for hourly mountain changes.
Shell lives on top
Stage the shell in the lid pocket and insulation in a 1 to 2 liter sack so storms cost 10 to 20 seconds.
Add before you stop
Pull insulation on before photo or lunch stops; a 20 to 30 minute standstill bleeds core heat fast.
Midlayers provide the bulk of comfort when temps fall. Choose fleece, lightweight wool or a synthetic puffy with 150–300 g loft equivalent depending on activity level. For aerobic climbs, lean toward thinner midlayers (150 g) because you generate 300–500 kcal per hour walking uphill and will overheat if insulated too heavily; for static periods—rests or summit time—use 250–300 g. Look for full-length zippers or pit zips on heavier midlayers to dump heat quickly; a zip can reduce body temperature by 2–4°F in a minute when open during a steady climb.
Base layer
- Snug merino or synthetic, dries under 60 min
- Best for: moving sweat off skin
- Never cotton, it holds 250 to 500 pct water
Outer shell
- Windproof plus 5000 mm rain rating
- Best for: wind over 15 mph and rain
- Vents dump 2 to 4 F in a minute
The insulating shell or puffy should compress into a 4–6 L space for day hikes and weigh 40–80 g for ultralight setups; for colder shoulder seasons choose 120–200 g. Down offers the best warmth-to-weight ratio (fill-power ratings 600–800), but synthetic insulation keeps some loft wet and resumes insulation in 10–20 minutes after compression and slight moisture. Always pair down with a waterproof outer shell when there is a risk of precipitation or heavy wind, since down loses loft when soaked and regains it only after thorough drying.

Adjusting Layers on the Trail
Practice three core adjustments so you can respond in 30–90 seconds: venting, adding insulation, and adding a shell. Venting means opening pit zips or unzipping midlayers while moving to shed heat quickly; do this when you notice perspiration increasing or your breathing rate rises above a brisk trekking pace. Adding insulation is best done during short stops: put on the midlayer first if you will be active within 10 minutes, otherwise add the insulating shell. Put the waterproof shell on if wind exceeds 15 mph or if visibility drops due to precipitation.
Pack layers by priority: keep the shell in an easily reachable top-pocket or outer compartment, the insulating layer in a compression sack toward the center, and spare base items lower down. Use a 1–2 L waterproof stuff sack for the insulating layer so you can pull it out without unpacking the whole bag; this prevents wetting the rest of your gear in a sudden storm. A small 200–500 g quick-dry buff or hat in the hip-belt pocket lets you respond in 10–20 seconds to sudden temperature drops.
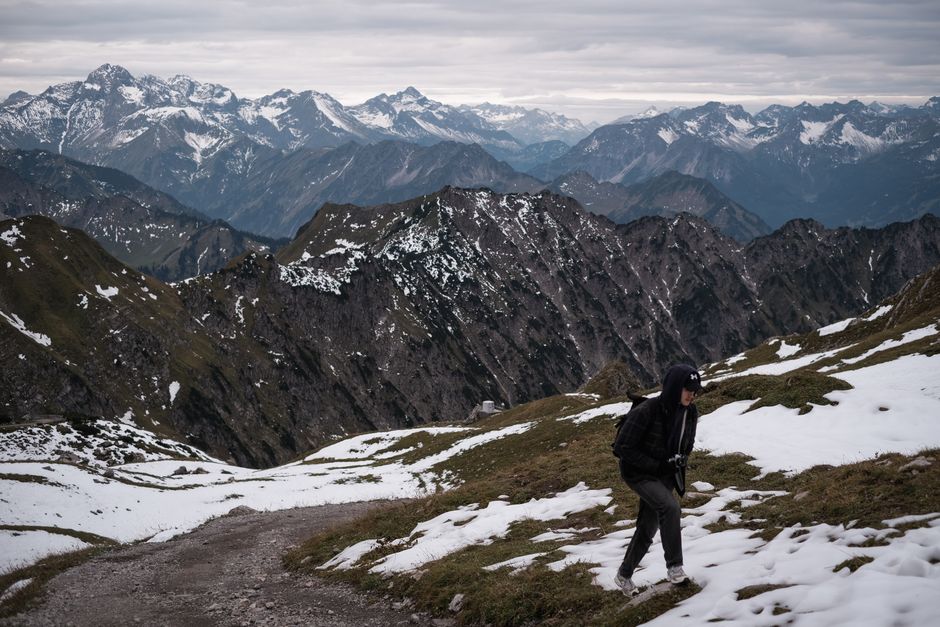
Know how weather timing affects choices: if you expect a 3-hour summit window with exposure to wind, plan for an extra 100–150 g of insulation beyond what you wear while hiking. If you will be descending and expect to stop for photos or lunch for 20–30 minutes, add the insulating shell before you stop to prevent core temperature from falling. Keep activity rhythm in mind: an uphill sustained climb increases heat production by roughly 250–500 kcal per hour, so you will need less insulation until you crest.
Emergency layering: carry a lightweight emergency blanket or a 30–50 g emergency bivy that compresses to 0.5–1 L. If someone becomes immobile, insulate immediately with a midlayer and the shell, then add the emergency bivy; treat 15 minutes of shivering as an escalation and move to sheltered, low-wind ground within 10 minutes if possible. Carry a spare pair of socks in a waterproof bag; wet feet lose heat 2–3 times faster and increase hypothermia risk on descents.
Frequently Asked Questions
Further reading: Road Shoes vs Trail Runners for Day Hikes · Trekking Poles for Bad Knees: Sizing and Use
Sources: National Park Service


One response